Key Takeaways:
- Essential tools: miter saw, tape measure, level, nail gun, Kreg Crown-Pro (~$30).
- Materials: standard 3 5/8″ crown molding (~$9.50 per 8ft from Lowe’s), 2” 18-gauge brad nails.
- Measure wall lengths/angles precisely; rooms rarely have perfect 90-degree corners.
- Use the Kreg Crown-Pro for angle precision; common angles include 38°, 45°, 52°.
- Cut molding upside down on a miter saw for clean edges; use miter for inside, reverse for outside corners.
- Nail spacing: 12-16 inches for stability; penetrate studs for secure attachment.
- Caulk seams and paint for a professional finish; dust and repair regularly.
- Advanced: Use scarf joints, add lighting, or layer moldings for style.
Want to give your room a new look with crown molding? It's simpler than you might think! I've put together a beginner-friendly guide. We will go over everything from the tools you'll need to measuring and cutting techniques. You'll also learn how to avoid common mistakes and explore creative designs. By the end, you'll feel like a pro, ready to transform any space with beautiful crown molding.
What Tools and Materials Are Needed for Crown Molding Installation?
When starting your crown molding project, having the right tools matters. You'll need basic tools like a miter saw, a tape measure, and a level. A Kreg Crown-Pro can make your task easier. It helps with cutting angles because it has an adjustable base and an angle finder. The tool is not too pricey, costing around $30.
For materials, standard 3 5/8″ crown molding is a great choice. You can find it at places like Lowe’s for about $9.50 per 8ft piece. This option keeps your project budget-friendly. Remember to buy a few extra molding pieces in case you make mistakes or some break.
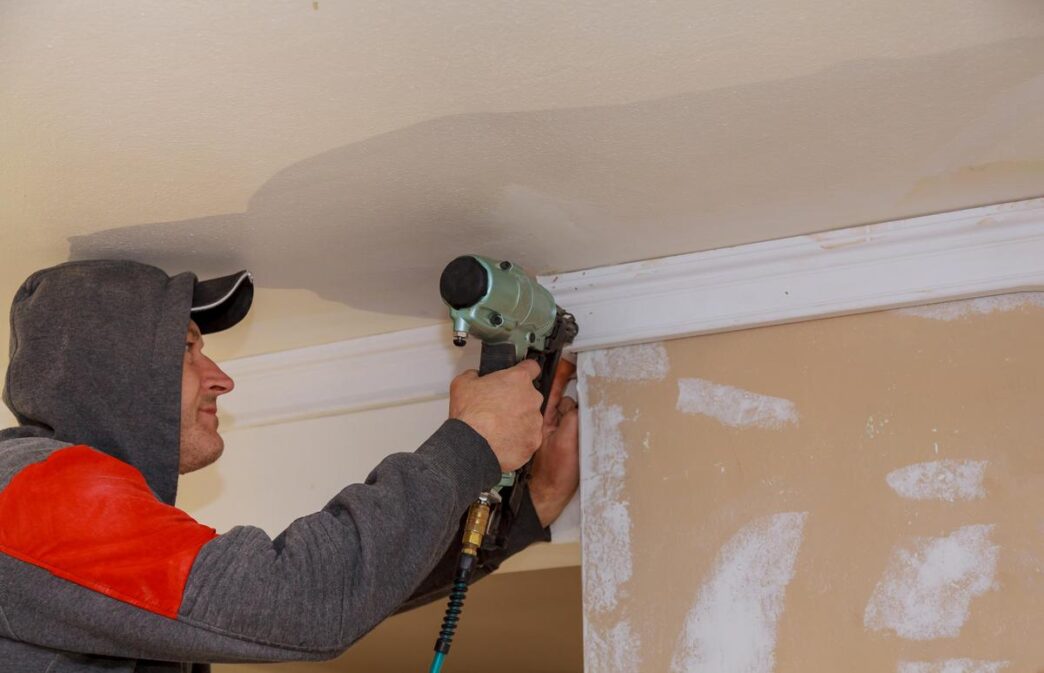
Your crown molding installation kit should also include nails and a nail gun. Use 2” 18-gauge brad nails for securing the molding. Place these nails about every 12-16 inches. This spacing keeps the molding tight against both the ceiling and walls.
Planning the prep work is as crucial as having the right materials. First, measure and record the angles of your walls to ensure they aren't assumed to be exact. Perfect 90-degree angles are rare, so this avoids any cutting surprises. Next, organize your tools in the order they will be needed. Think through each step beforehand to ensure smooth progress and avoid unnecessary stress.
Visit places like Amazon for prices on tools. Good tools save time and improve quality, enhancing your home with professional-looking finish. Always keep extra materials and caulk on hand. This makes it easier to correct tiny gaps or mistakes.
Setting up your space is part of the fun and efficiency. A tidy work zone gives you more room to focus and create. Being prepared makes the project enjoyable and results more rewarding.
How Do You Measure and Cut Crown Molding Accurately?
Accurate measuring is key when installing crown molding. Begin by measuring the length of each wall to the nearest eighth of an inch. Use a tape measure for precision. Always check if the corners form true right angles. Most rooms are not perfect squares, so measure each angle precisely.
When it comes to angles, a Kreg Crown-Pro tool is your best friend. It helps find the spring angle, which is the angle at which the molding rests against the wall. Common angles are 38 degrees, 45 degrees, or 52 degrees. Knowing these angles ensures your cuts fit snugly.
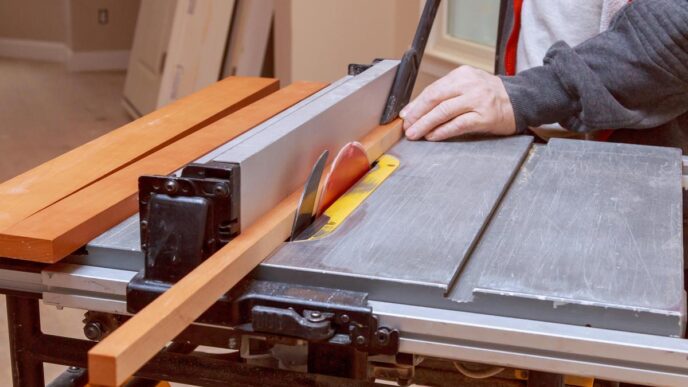
Using a miter saw is essential for precision cuts in crown molding. Place the molding upside down on the saw. This allows the bottom edge of the molding to rest against the saw fence, giving a cleaner edge. Practice using scrap pieces first. This saves your good pieces from mistake cuts.
Understanding the proper way to cut crown molding angles is crucial. You’ll make two main types of cuts: miter cuts and coping cuts. Miter cuts join two pieces in a corner. Coping cuts create an overlap for a seamless joint. Miter the molding ends at a 45-degree angle for inside corners. For outside corners, cut them with a reverse 45-degree angle.
Precision is key for both tools and angles. Place nails approximately every 12 to 16 inches along the molding. This holds it tight to the wall and ceiling. Use 2-inch brad nails to secure it well. Remember, practice and patience enhance your skills better than any tool.
What Are the Steps to Install Crown Molding?
Detailed Step-by-Step Guide
First, gather your tools and materials. You'll need crown molding, a miter saw, a Kreg Crown-Pro, measuring tape, a nail gun, and brad nails. It's smart to have some caulk and paint ready too. Start by measuring the room's length and corners. Use a measuring tape for precise measurements. Make sure you jot down each angle because corners are not always perfect 90 degrees.
Next, cut the molding using the miter saw. Place it upside down on the saw. This way, the cuts fit snug against the ceiling and wall. The Kreg Crown-Pro can help keep the angles correct. It adjusts to find the spring angles, which are often 38°, 45°, or 52°. Correct angles ensure clean joints.
Now, start installing pieces. Fit the crown molding at the corners and nail them into place. Use a nail gun with 2" 18-gauge brad nails. Space these nails about every 12 to 16 inches. This keeps the molding tight and prevents gaps. Begin with corner pieces, as this sets the stage for the rest.
Securing Crown Molding to Walls
To attach the crown molding to the wall properly, ensure your nails penetrate into studs or solid framing. This gives it stability. If you miss a stud, use a strong adhesive on the back of the molding. For longer walls, use scarf joints. Cut the ends of two pieces at matching angles and overlap them. This overlapping avoids gaps and splits visible seams after completion.
Techniques for Different Room Types
Different rooms may require special techniques. For rooms with uneven ceilings, adjust the molding as you nail it to follow the ceiling's contour. For smaller rooms, steal depth for visual impact by lowering the position of the molding on the walls. This can enhance the space perception and add a bold, elegant touch.
After placing all the molding, caulk the seams and any gaps. This becomes especially useful in older homes with uneven walls. Finally, paint to match your existing trim for a smooth finish. This method is not just easy but budget-friendly too.
How Can You Avoid Common Mistakes During Installation?
Recognizing and Avoiding Common Errors
Avoiding mistakes during crown molding installation is key for success. Always double-check your measurements before cutting. Misjudged angles can lead to gaps and unsteady fits. Use the Kreg Crown-Pro tool to ensure precision. It will help you get the right "spring angle." Remember, a wrong angle cut can ruin the entire piece.
Troubleshooting During Installation
Problems can occur even with great preparation. If pieces don't match up, reassess your cut angles. Measure wall angles accurately; they might not be perfect 90°. If you've cut too short, you can't lengthen the piece. Instead, sand down a small additional piece to fill the gap. For longer walls, joining pieces properly is crucial. Always overlap scarf joints instead of butting them together.
Expert Tips for Seamless Results
For seamless installation, remember these tips. Use 2-inch brad nails approximately every 12 to 16 inches. This keeps the molding tight against the ceiling and wall. When cutting, place the molding upside down for a clean edge. Secure molding with a nail gun for a firm hold. Use caulk to hide gaps and seams once all pieces are in place. Finally, choose a semigloss paint to match the existing trim. This gives your project a polished, professional finish.
If you want even more advice, this guide offers further tips and tricks to help. Crown molding improves room aesthetics when installed right. With care and skill, your DIY project will look great.
What Are Some Advanced Techniques and Designs for Crown Molding?
Advanced Techniques for a Professional Finish
To get that really sharp look, start with precise cuts. Measure twice to make sure your angles fit right. Use a Kreg Crown-Pro to cut angles easily. This tool helps find the perfect “spring angle” of your crown molding. Most crowns sit at 38°, 45°, or 52°. Cutting the molding upside down makes the edges line up nicely with the ceiling. Nail the molding every 12-16 inches using 2" 18-gauge brad nails. Overlap scarf joints if your walls need longer molding. This makes the joint look smooth and neat.
Innovative Design Ideas for Different Rooms
Crown molding can add charm to any room. For the living room, try painting the crown a bold color different from the walls. It creates a nice contrast that catches the eye. Patterned crown designs add style and work well in dining rooms. Try mixing smaller, simpler moldings for a layered look. Each layer adds depth and makes the room feel rich and full. Matching crown molding with the baseboards in the room ties everything together.
Incorporating Lighting and Other Elements
Crown molding isn’t just about looks; it can serve a purpose too. Add lighting inside your moldings for extra shine. LED strips behind the crown can brighten the ceiling softly. Underneath the crown, a small gap for light can turn a dark room into a bright one. You can also use crown molding to run small wires or hide cords. This trick keeps the walls looking clean and free of clutter. Adding details like small shelves or hooks into crown molding has become popular too. Small elements can transform a room, making it both beautiful and useful.
How Do You Achieve a Professional Finish and Maintenance?
Finishing Touches for a Polished Look
Once your crown molding is up, it's time to make it shine. Start by smoothing out the edges with sandpaper. This erases any rough spots. Painting is the next big step. Use semigloss paint to give your molding a fresh look. This type of paint is perfect for trim. It adds a soft shine that blends with most walls. Caulking is also essential in achieving a smooth look. Apply caulk to cover any gaps between the wall and the molding. Once painted, everything looks tidy and connected.
Maintaining and Cleaning Tips
Crown molding requires some care to keep its beauty. Dust is the biggest enemy. Use a microfiber cloth to wipe away dust. Do this at least once a month. For stubborn grime, a damp cloth with mild soap can help. Avoid harsh cleaners that can damage paint. Check your molding for any cracks. Fix these quickly to prevent bigger issues. Regular upkeep keeps your molding looking as good as new.
Proper Techniques for Filling Gaps
Gaps in crown molding can spoil its appearance. To fill gaps, you need caulk or wood filler. First, clean the gap area to ensure the filler sticks well. Use a caulk gun to apply caulk evenly. Drag a finger or tool over it to smooth out. For bigger gaps, wood filler works best. Apply with a small putty knife, then sand once dry. Painting over the gap makes it vanish. These techniques make your molding flawless. Practice them to maintain a professional finish throughout your home.
Conclusion
Crown molding gives any room a classy touch. We covered everything needed for this DIY project—from tools and measuring tricks to avoiding mistakes and finishing touches. Remember, having the right tools and solid techniques makes all the difference. You'll save money and get a professional look at home. Every cut matters, so take your time and follow each step. Keep exploring advanced ideas, and soon, you'll master crown molding. With practice and patience, your work will shine. Now, grab your tools and start transforming those rooms!


